Aroma Steam Cooker Instructions: A Comprehensive Guide (Updated March 30‚ 2026)
This guide details operation for the Aroma 10 Cup Digital Rice Cooker & Food Steamer (ARC-930)‚ published in 2006‚ offering instructions for optimal use.
Understanding Your Aroma Steam Cooker
Your Aroma steam cooker is a versatile kitchen appliance designed for effortless cooking‚ primarily focusing on rice but extending to steaming various foods. The ARC-930 model‚ released in 2006‚ combines the functionality of a rice cooker and a food steamer into one convenient unit. Understanding its core principles ensures optimal performance and longevity.

This appliance utilizes controlled heating and steam to cook food evenly and efficiently. Unlike traditional stovetop methods‚ Aroma cookers automate the process‚ preventing scorching and ensuring consistent results. The digital interface allows for precise control over cooking cycles‚ catering to different rice types and steaming needs. Familiarizing yourself with these features will unlock the full potential of your Aroma cooker‚ simplifying meal preparation and expanding your culinary possibilities.
Model Variations & Common Features
Aroma offers a diverse range of steam cookers‚ though the core functionality remains consistent across models. The ARC-930‚ a popular 10-cup option from 2006‚ represents a foundational design. Newer variations may include enhanced digital displays‚ expanded pre-programmed settings (like quinoa or oatmeal)‚ and larger capacity options.
Common features across most Aroma cookers include a non-stick inner pot for easy cleaning‚ a steaming basket for vegetables or seafood‚ and a condensation collector to prevent water damage. Digital controls allow for precise timing and temperature regulation. The “Keep Warm” function is standard‚ maintaining food temperature after cooking. Understanding these shared elements simplifies transitioning between different Aroma cooker models.
Unboxing and Initial Setup
Upon unboxing your Aroma steam cooker‚ carefully remove all packaging materials. Verify all components are present: the cooker base‚ inner pot‚ steaming tray‚ condensation collector‚ and measuring cup. Before first use‚ thoroughly wash the inner pot‚ steaming tray‚ and measuring cup with warm‚ soapy water. Rinse and dry completely.
Wipe down the cooker base with a damp cloth – avoid submerging it in water. Place the cooker on a stable‚ level surface away from flammable materials. It’s recommended to perform a test run with water only‚ following the basic rice cooking instructions‚ to eliminate any potential manufacturing odors. This ensures a clean and safe cooking experience;
Component Identification
The Aroma steam cooker comprises several key components. The inner pot‚ typically non-stick‚ holds the rice and other foods during cooking. The steaming tray‚ placed above the inner pot‚ allows for simultaneous steaming of vegetables or proteins. A condensation collector catches excess moisture‚ preventing messy overflows.
A provided measuring cup ensures accurate rice-to-water ratios. The control panel features buttons for various functions like cook‚ warm‚ and delay start. Familiarizing yourself with each component’s purpose is crucial for efficient operation and maintenance of your Aroma cooker‚ maximizing its versatility.
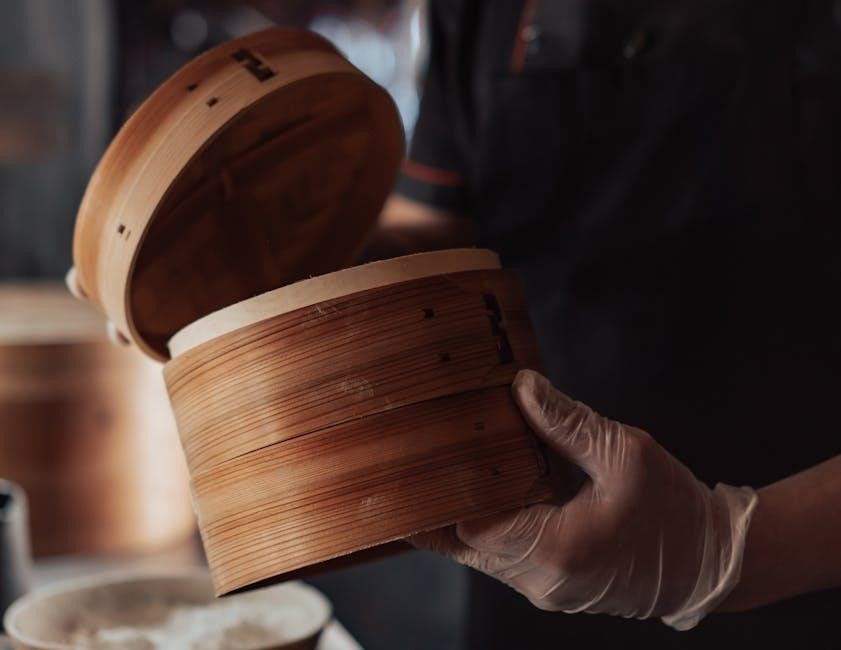
Inner Pot & Steaming Tray
The inner pot‚ usually aluminum with a non-stick coating‚ is the heart of your Aroma cooker. Ensure it’s clean and free of debris before each use. The steaming tray‚ often made of plastic or stainless steel‚ sits above the inner pot. It’s designed to hold food separate from the boiling water‚ allowing for healthy‚ flavorful steaming.
Proper placement of the steaming tray is vital for even cooking. Avoid overcrowding the tray to ensure steam circulation. Regularly inspect both components for wear and tear; replace if damaged to maintain optimal performance and food safety.
Condensation Collector & Measuring Cup
The condensation collector‚ a small container typically located at the back of the Aroma cooker‚ catches excess moisture produced during cooking. Regularly emptying this collector prevents overflow and maintains hygiene. It’s crucial for preventing water damage and ensuring proper operation.
The included measuring cup is specifically designed for accurate rice and water measurements‚ vital for achieving perfectly cooked rice. Using standard measuring cups can lead to inconsistent results. Always refer to the rice-to-water ratio guide for your specific rice type. Proper measurement is key to delicious outcomes!
Control Panel Overview
The Aroma cooker’s control panel features intuitive buttons for easy operation. Typically‚ you’ll find a “Cook/Start” button to initiate the cooking cycle‚ and “Warm” to maintain temperature after cooking completes. A “Delay Start” option allows for programmed cooking times.
Indicator lights clearly display the cooker’s current status – “Cook” illuminates during operation‚ while “Warm” signals the keep-warm function is active. Some models include settings for different rice types (white‚ brown‚ etc.). Familiarizing yourself with these controls ensures efficient and customized cooking experiences.
Basic Operation: Cooking Rice
Cooking rice with your Aroma cooker is straightforward. Begin by rinsing the rice to remove excess starch‚ contributing to fluffier results. Accurate rice-to-water ratios are crucial; variations exist for white and brown rice.
Generally‚ the cooker automatically adjusts cooking time based on the selected setting. Ensure the inner pot is properly seated before pressing “Cook/Start”. The cooker will switch to the “Warm” setting upon completion. Experimenting with water levels allows you to achieve your preferred rice texture. Consistent practice yields perfectly cooked rice every time.
Rice to Water Ratio – A Crucial Guide
Achieving perfect rice requires understanding the rice-to-water ratio. For white rice‚ a common starting point is 1 cup of rice to 1.5 cups of water‚ though adjustments may be needed based on rice type. Brown rice‚ being denser‚ typically needs more water – around 1 cup of rice to 2 cups of water.
The Aroma cooker’s measuring cup is designed for accurate portions. Remember that variations in rice grain length and age can affect water absorption. Always refer to package instructions as a guide‚ and don’t hesitate to experiment to find your ideal consistency.
White Rice Cooking Instructions
Begin by rinsing the desired amount of white rice under cold water until the water runs clear – this removes excess starch. Add the rinsed rice and the appropriate amount of water (typically a 1:1.5 ratio) to the Aroma cooker’s inner pot. Ensure the inner pot is properly seated within the cooker.
Close the lid securely and select the “White Rice” setting. Press start‚ and allow the cooker to automatically switch to the “Keep Warm” mode once cooking is complete. Let the rice rest‚ covered‚ for 10-15 minutes before fluffing with a fork for optimal texture.
Brown Rice Cooking Instructions
Preparing brown rice requires a slightly different approach than white rice due to its bran layer; Rinse the brown rice thoroughly under cold water. A typical water ratio for brown rice is 1:2;5 (rice to water)‚ but adjustments may be needed based on rice variety. Place the rinsed rice and water into the Aroma cooker’s inner pot.
Securely close the lid and select the “Brown Rice” setting. Press start‚ and allow the cooker to complete the cycle‚ automatically switching to “Keep Warm”. Let the cooked brown rice rest‚ covered‚ for 10 minutes before fluffing with a fork to achieve a tender texture.
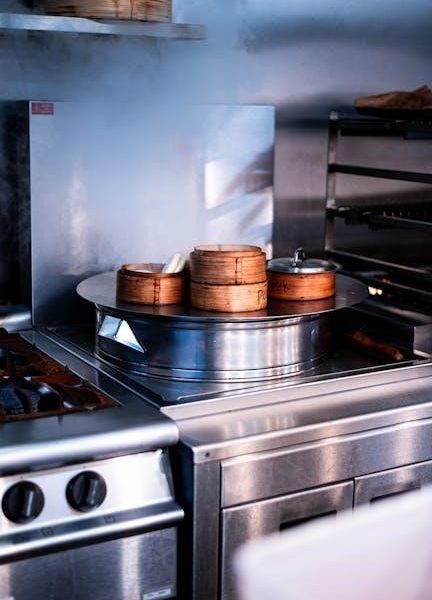
Steaming with Your Aroma Cooker
Your Aroma cooker isn’t just for rice; it’s a versatile steamer! Utilize the included steaming basket to prepare healthy and delicious meals. Ensure sufficient water is in the inner pot – typically 1 cup – to generate steam without touching the food. Place food inside the steaming basket‚ ensuring it isn’t overcrowded for even cooking.
Select the “Steam” function‚ or if unavailable‚ use the “White Rice” setting and manually stop the cycle when steaming is complete. Monitor water levels during longer steaming sessions‚ adding more if needed. Enjoy perfectly steamed vegetables‚ fish‚ or dumplings!
Vegetable Steaming Techniques

Steaming vegetables in your Aroma cooker preserves nutrients and flavor beautifully. For delicate vegetables like broccoli or asparagus‚ a shorter steaming time (5-7 minutes) is ideal. Root vegetables‚ such as carrots and potatoes‚ require longer – around 10-15 minutes – until tender-crisp.
Cut vegetables into uniform sizes for even cooking. Consider adding herbs or lemon slices to the steaming water for enhanced flavor. Avoid overfilling the steaming basket; allow space for steam circulation. Regularly check for doneness using a fork – vegetables should be easily pierced but retain some texture.
Meat & Seafood Steaming Guidelines

Steaming meat and seafood in your Aroma cooker yields incredibly moist and flavorful results. For fish fillets‚ a steaming time of 8-12 minutes is generally sufficient‚ depending on thickness. Chicken pieces require approximately 15-20 minutes‚ ensuring they are cooked through to an internal temperature of 165°F (74°C).
Marinate meats and seafood beforehand to infuse them with extra flavor. Place the protein on the steaming tray‚ ensuring it doesn’t touch the water. Consider adding aromatics like ginger‚ garlic‚ or herbs to the water for enhanced taste. Always verify internal temperature with a meat thermometer for safety.
Using the Steaming Basket Effectively
Maximize your Aroma cooker’s steaming capabilities with proper basket usage. Ensure food isn’t overcrowded; allow space for steam circulation for even cooking. For delicate vegetables‚ line the basket with parchment paper to prevent sticking and facilitate easy removal.
The steaming basket should sit securely above the water level‚ avoiding direct contact. Add approximately 1 cup of water to the inner pot for sufficient steam generation. Regularly check the water level during longer steaming sessions‚ replenishing as needed. Properly utilizing the basket unlocks healthier‚ flavorful meals.
Advanced Features & Functions
Beyond basic rice cooking and steaming‚ your Aroma cooker boasts versatile advanced functions. Explore the slow cooking capability for tender‚ flavorful meals with minimal effort – perfect for soups and stews. The convenient “Keep Warm” function maintains food temperature safely for extended periods‚ ideal for gatherings.
Utilize the Delay Start timer to schedule cooking in advance‚ ensuring a hot meal awaits you. This feature allows for up to 24-hour programming. Understanding these functions expands your culinary possibilities‚ transforming your Aroma cooker into a multi-functional kitchen appliance.
Slow Cooking Capabilities
The Aroma steam cooker’s slow cooking function provides a convenient method for preparing delicious‚ tender meals with minimal supervision. This feature excels at creating flavorful soups‚ stews‚ and braised dishes. Lower temperatures and extended cooking times break down tough cuts of meat‚ resulting in incredibly tender results.
Remember to adjust liquid levels accordingly‚ as slow cooking minimizes evaporation. Always ensure ingredients are fully submerged for even cooking. Experiment with different recipes to unlock the full potential of this versatile function‚ enjoying home-cooked goodness with ease.
Keep Warm Function – Duration & Safety
The Aroma cooker’s “Keep Warm” function automatically activates after cooking cycles complete‚ maintaining food temperature for extended periods. Typically‚ food can safely remain on “Keep Warm” for up to 12 hours‚ though quality may diminish over time. This feature is ideal for delayed meals or gatherings.
However‚ avoid leaving cooked rice on “Keep Warm” for excessively long durations‚ as it can dry out or develop undesirable textures. Regularly check food moisture levels. Never leave perishable items on “Keep Warm” unattended for prolonged periods to prevent bacterial growth and ensure food safety.
Delay Start Timer – Setting & Usage
The Aroma cooker’s delay start function allows convenient pre-programming for automated cooking. To utilize this feature‚ first prepare the cooker with rice and water‚ then press the “Delay Start” button. Use the “Hour” and “Minute” buttons to set the desired start time. The cooker will automatically begin cooking at the programmed time.
Ensure ingredients remain fresh during the delay period; avoid using perishable items for extended delays. Always verify the cooker is properly sealed and functioning before initiating the delay start. This feature is perfect for waking up to freshly cooked rice or having dinner ready upon arrival.
Cleaning and Maintenance
Regular cleaning ensures optimal performance and longevity of your Aroma steam cooker. After each use‚ unplug the cooker and allow all components to cool completely. The inner pot and steaming tray are typically dishwasher-safe‚ but hand washing is recommended for delicate finishes. Wipe the exterior with a damp cloth; avoid abrasive cleaners.
Pay close attention to the condensation collector‚ emptying and cleaning it after each use to prevent build-up. Proper maintenance prevents food odors and ensures consistently delicious results. Store the cooker in a dry‚ cool place when not in use‚ protecting it from dust and moisture.
Proper Cleaning Procedures
Begin by unplugging the Aroma cooker and ensuring all parts are cool. Remove the inner pot‚ steaming tray‚ and condensation collector. These components can usually be washed in the dishwasher on a gentle cycle‚ though handwashing with warm‚ soapy water is preferred to preserve their quality.
For the cooker’s exterior‚ wipe down with a damp cloth. Avoid harsh chemicals or abrasive sponges. Inspect the heating plate for any stuck-on food particles and gently remove them. Thoroughly dry all parts before reassembling. Regular‚ diligent cleaning prevents odors and maintains peak performance.
Preventing Food Build-Up & Odors
To minimize food residue‚ promptly clean the inner pot after each use. A quick rinse immediately after cooking prevents sticking. For stubborn build-up‚ a paste of baking soda and water can be effective – let it sit briefly before scrubbing gently.
To combat odors‚ occasionally steam a solution of water and lemon juice. Ensure the cooker is completely dry after cleaning‚ as moisture fosters bacterial growth. Proper ventilation during cooking also helps. Consistent cleaning and these preventative measures will keep your Aroma cooker fresh and functioning optimally for years.
Long-Term Storage Recommendations
When storing your Aroma cooker for extended periods‚ ensure all components are thoroughly cleaned and completely dry to prevent mold or mildew. Remove the power cord and store it separately to avoid damage. It’s best to store the cooker in its original packaging‚ if available‚ or a clean‚ dry location.
Avoid storing in areas with high humidity or extreme temperatures. Periodically check the cooker during storage to ensure no moisture has accumulated. Proper storage safeguards your investment‚ preserving functionality and extending the lifespan of your Aroma steam cooker for future use.
Troubleshooting Common Issues
Encountering problems with your Aroma cooker? A common issue is the cooker failing to turn on – verify the power cord is securely connected to both the cooker and a functioning outlet. If rice is consistently undercooked‚ slightly increase the water ratio or extend the cooking time. Conversely‚ overcooked rice suggests reducing water or shortening the cycle.
For other concerns‚ ensure the inner pot is correctly positioned and the steam vent isn’t blocked. Refer to the full manual for detailed solutions and safety precautions. Addressing these issues promptly ensures continued‚ reliable performance from your Aroma appliance.
Cooker Not Turning On
If your Aroma cooker isn’t powering on‚ begin with the simplest checks. First‚ confirm the power cord is firmly plugged into both the cooker’s rear panel and a working electrical outlet. Test the outlet with another device to rule out a power supply issue. Ensure the inner pot is properly seated within the cooker base; a misaligned pot can prevent operation.
Also‚ verify the lid is securely closed‚ as many models feature a safety mechanism that prevents operation if the lid isn’t fully locked. If problems persist‚ consult the full user manual for further troubleshooting steps and safety guidelines.
Rice is Under/Overcooked
Experiencing undercooked or overcooked rice often stems from incorrect water-to-rice ratios. Refer to the ‘Rice to Water Ratio’ guide for precise measurements‚ differing between white and brown rice varieties. Ensure accurate measuring using the provided measuring cup. Variations in rice grain size can also impact cooking times; adjust water slightly as needed.
If rice is consistently undercooked‚ try adding a tablespoon or two more water. For overcooked rice‚ reduce water slightly in subsequent attempts. Avoid lifting the lid during the cooking cycle‚ as this releases steam and disrupts the process.